Object detection - Part 1
July 2022
Catching up
Wow, it’s been over a year and a half since I’ve made significant progress on this project. I’ve been busy on various other things, and honestly the idea of tackling a computer vision object detection project seemed so daunting. Exciting, but daunting. I’ve been wanting to start working on this for…, well, over a year and a half. So it’s time to get going on it!
Well, actually I hadn’t been totally ignoring this project for all that time. Back in Dec 2020 I enrolled in an OpenCV for Python course on Udemy. After getting into that course a bit, I realized I needed to brush up on my linear algebra, so I enrolled in another Udemy course Complete linear algebra: theory and implementation in code. I took my time completing both courses, getting in a few hours from time to time, taking notes, and researching related concepts. I also felt compelled to complete these courses before tackling the object detection part of R2B2. I will say both course were excellent, and I even caught them on sale for around $20 USD each. I highly recommend these courses if you are unfamiliar with linear algebra or OpenCV.
In the OpenCV course, I learned about the YOLOv3 deep learning network for fast object detection. After some research about object detection networks, I decided I would focus on YOLO and also Keras/Tensorflow for my implementation.
Learning YOLOv3
I looked at numerous YOLOv3 / Tensoflow implementations, and eventually chose to fork and customize this repo: zzh8829/yolov3-tf2. My repo is sheaffej/obj-detect-yolov3-tf2, and is mostly a modifcation of the interfaces around the core YOLOv3 implementation to work with my use case and model training scripts.
As I worked with the YOLOv3 network, I ended up reading zzh8829’s Python code multiple times. In my repo, I added a lot of comments to help me understand how the various part work. I must admit I learned A LOT about numpy and Tensorflow doing this.
I needed to train a custom model that can detect the cat toys that I have around the house. So I started by using the VOC 2012 training examples in the original repo, and worked through the code until I was successfully training models on that example data set. This is where I learned the most about the code, and YOLOv3 in general.
Along the way, I found and completed a really good Udemy course on how YOLOv3 works and how to train the model for custom data: Train YOLO for Object Detection with Custom Data.
Training my Cat Toys YOLOv3 model with Tensorflow
Now having the YOLOv3 model working when training using the VOC 2012 data set, I turned to my own data and object detection task –> detecting cat toys lying around my house.
First I needed some images of cat toys in my house. I grabbed a bunch of cat toys and decided which cat toys I wanted to train the model to detect first.
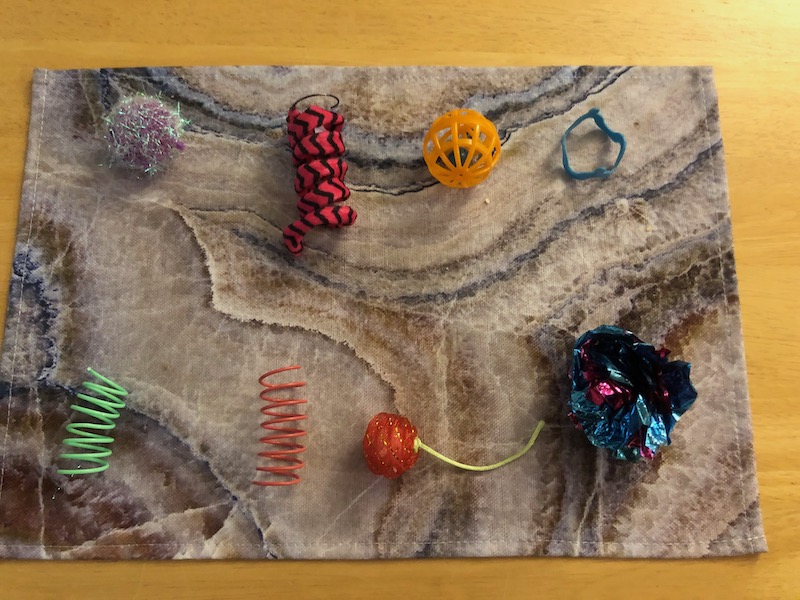 In this picture of eight cat toys, I decided to label them as:
tinselball |
fabricspring |
bellball |
wavycircle |
spring |
spring |
stringball |
crinkleball |
I also added five more later: fabricmouse, plainball, airball, foamball, and fluffyball
Therefore my list of object classes were:
spring
fabricspring
plainball
tinselball
bellball
crinkleball
stringball
fabricmouse
wavycircle
foamball
airball
fluffyball
One morning, I used my iPhone to take 576 pictures of various combinations of these cat toys, in various spots in my house. I’m limiting the project to working with cat toys on my downstairs. I kept a handful of blurry pictures to help with model regularization, and also took some pictures of the same parts of the house with no cat toys in the image. I didn’t really get an equal distribution of images with each object, because at this point I just need to make sure the model can train on these images. I can always get more images later.
I’ve decided not to publish my images as part of this project. Considering the number of pictures of various parts of my house from various angles, I’m sure some clever CV person could stitch them together to render a full 3D model of my home’s downstairs and most of the objects inside. And I’d rather that not happen.
I spend the better part of a weekend (on and off) annotating these images using LabelImg.
Through many, many training iterations I was able to get the model to successfully detect some of the cat toys in my test images set. The classification probabilities were very low, however. And this led to the model not detecting most of the objects at all.
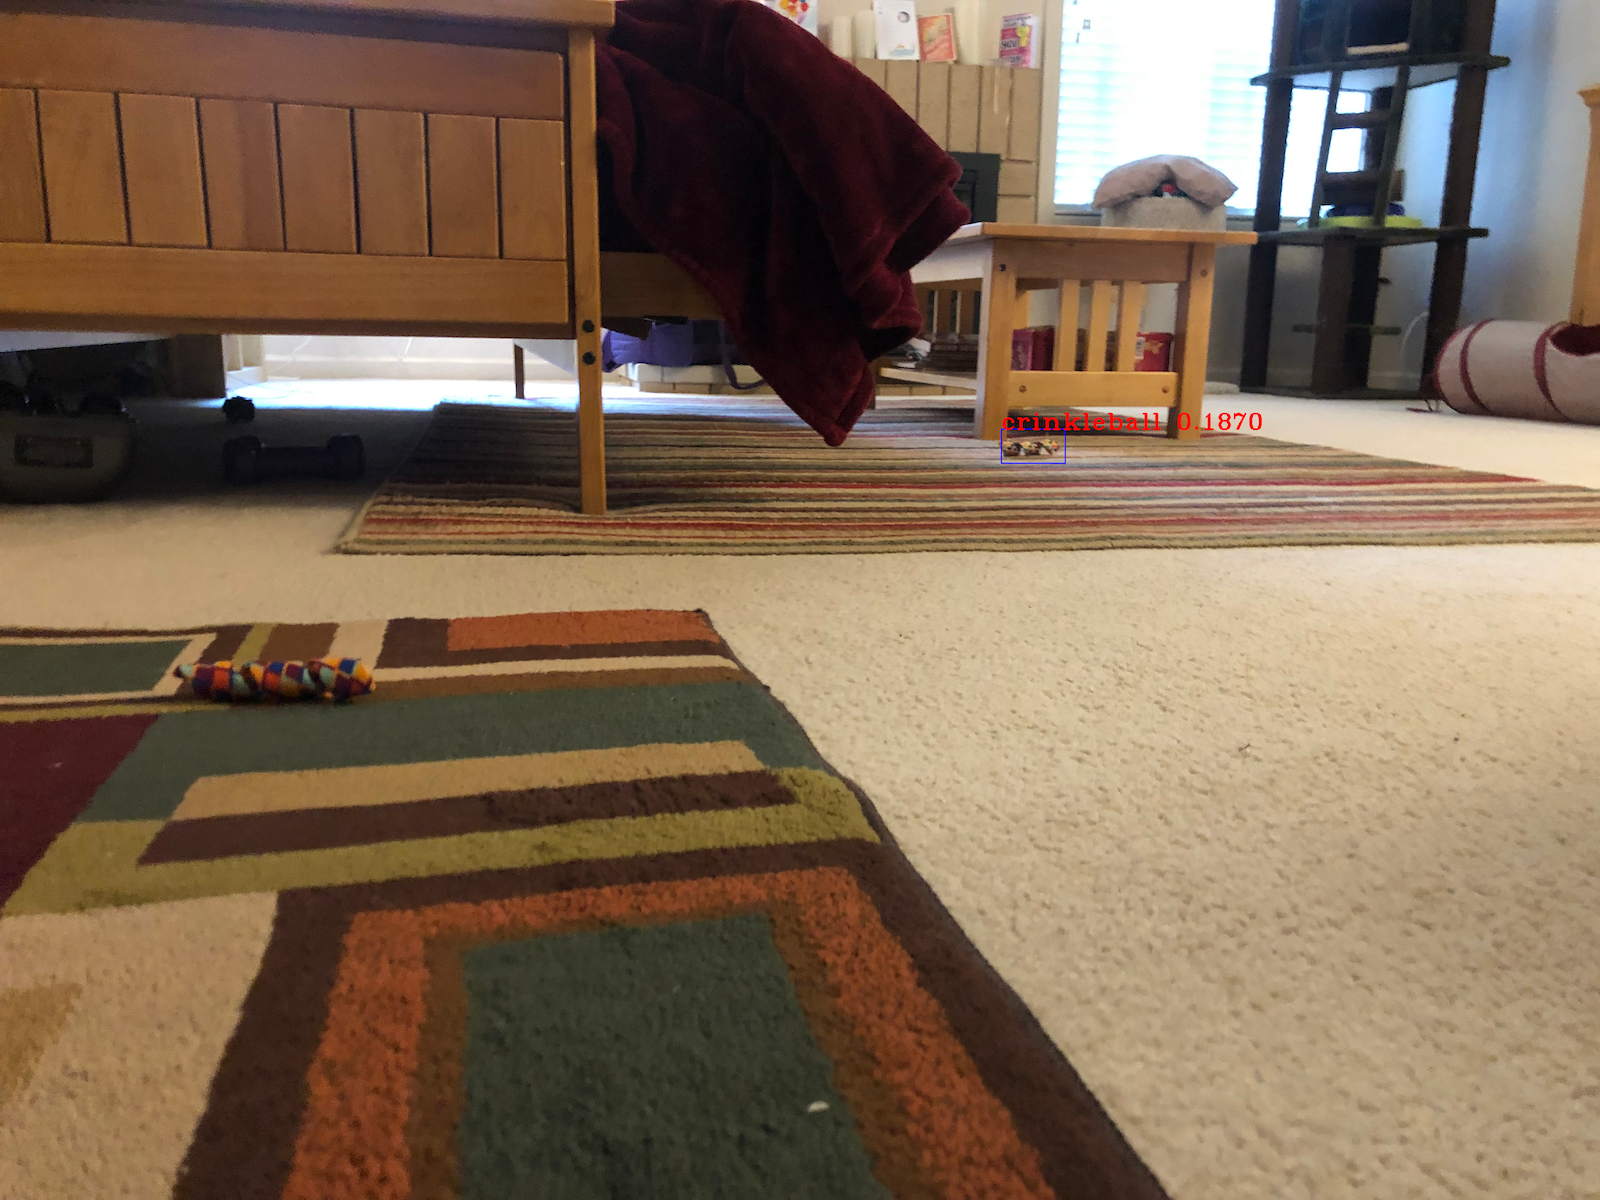 This image above has two
 fabricsprings (and a crinkleball hiding under the futon at the top-left). But only one fabricspring was detected, and it was incorrectly detected as a crinkleball, with only 18.7% probability.
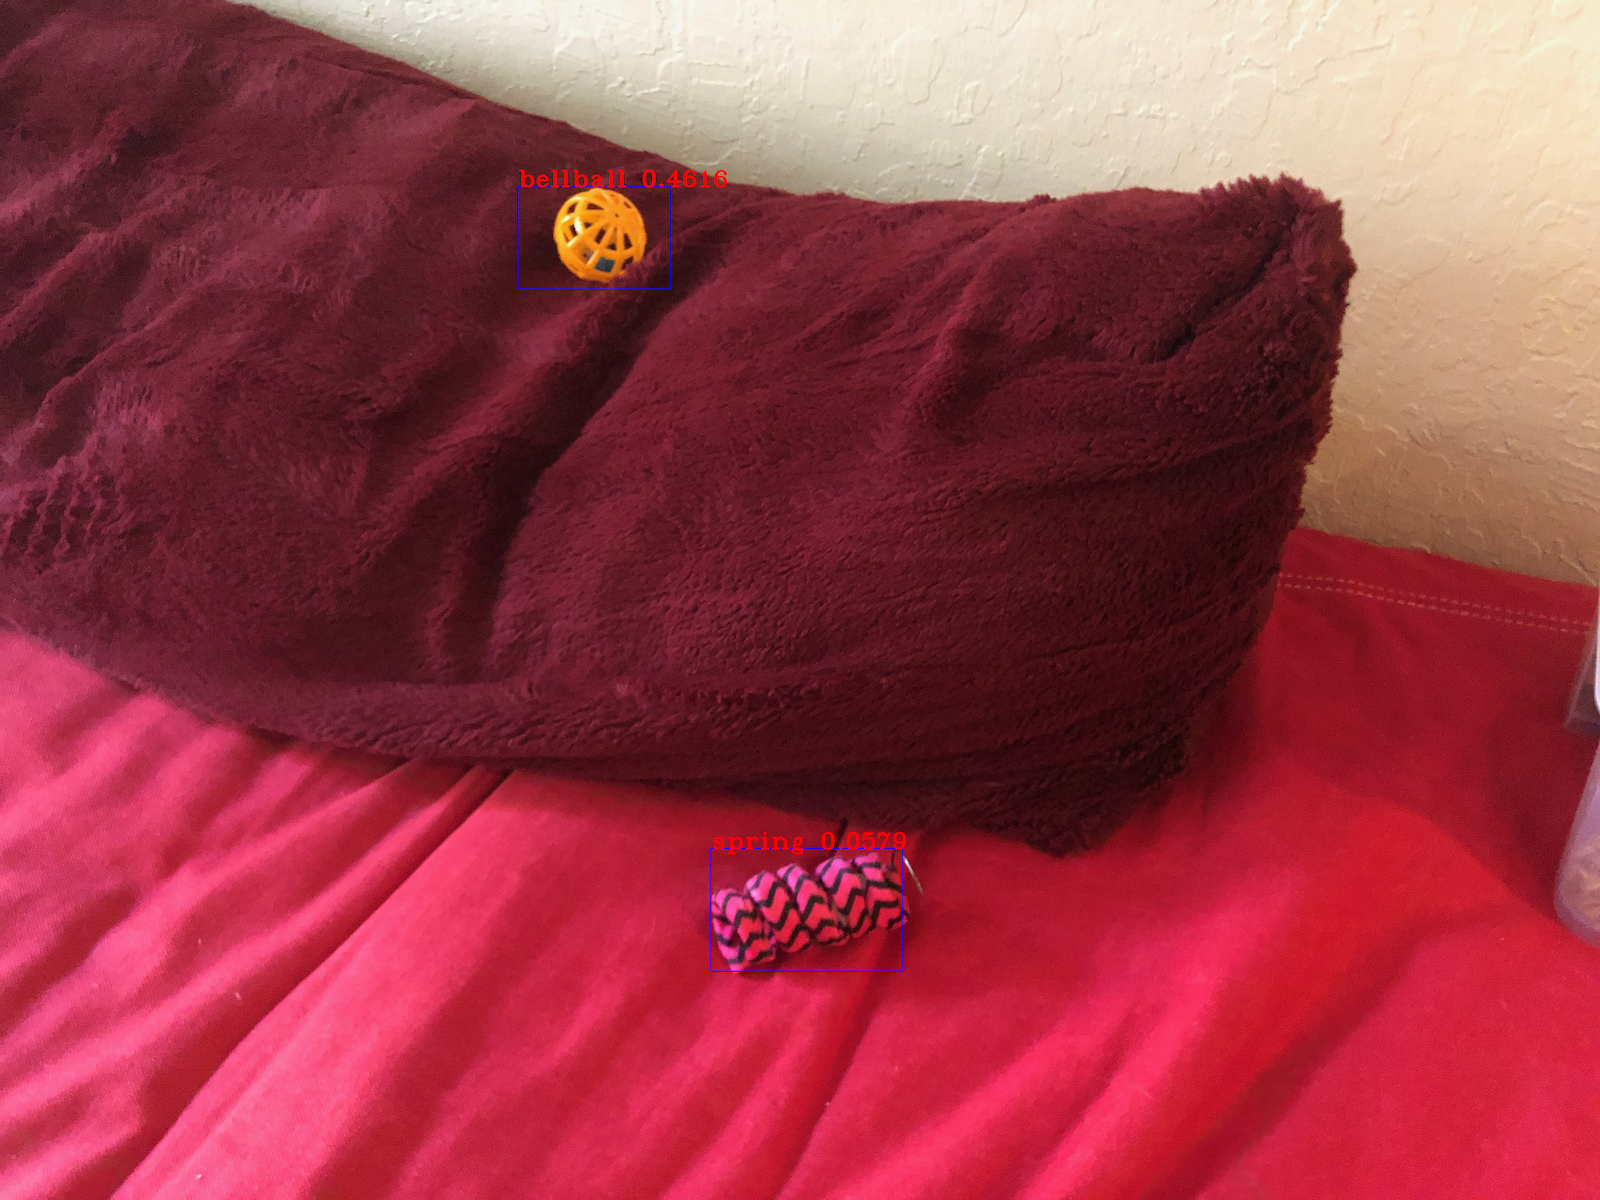 This image above has a
 bellball correctly detected, but at only 46.16% probability. And a fabricspring that was incorrectly detected as a spring at 5.79% probability.
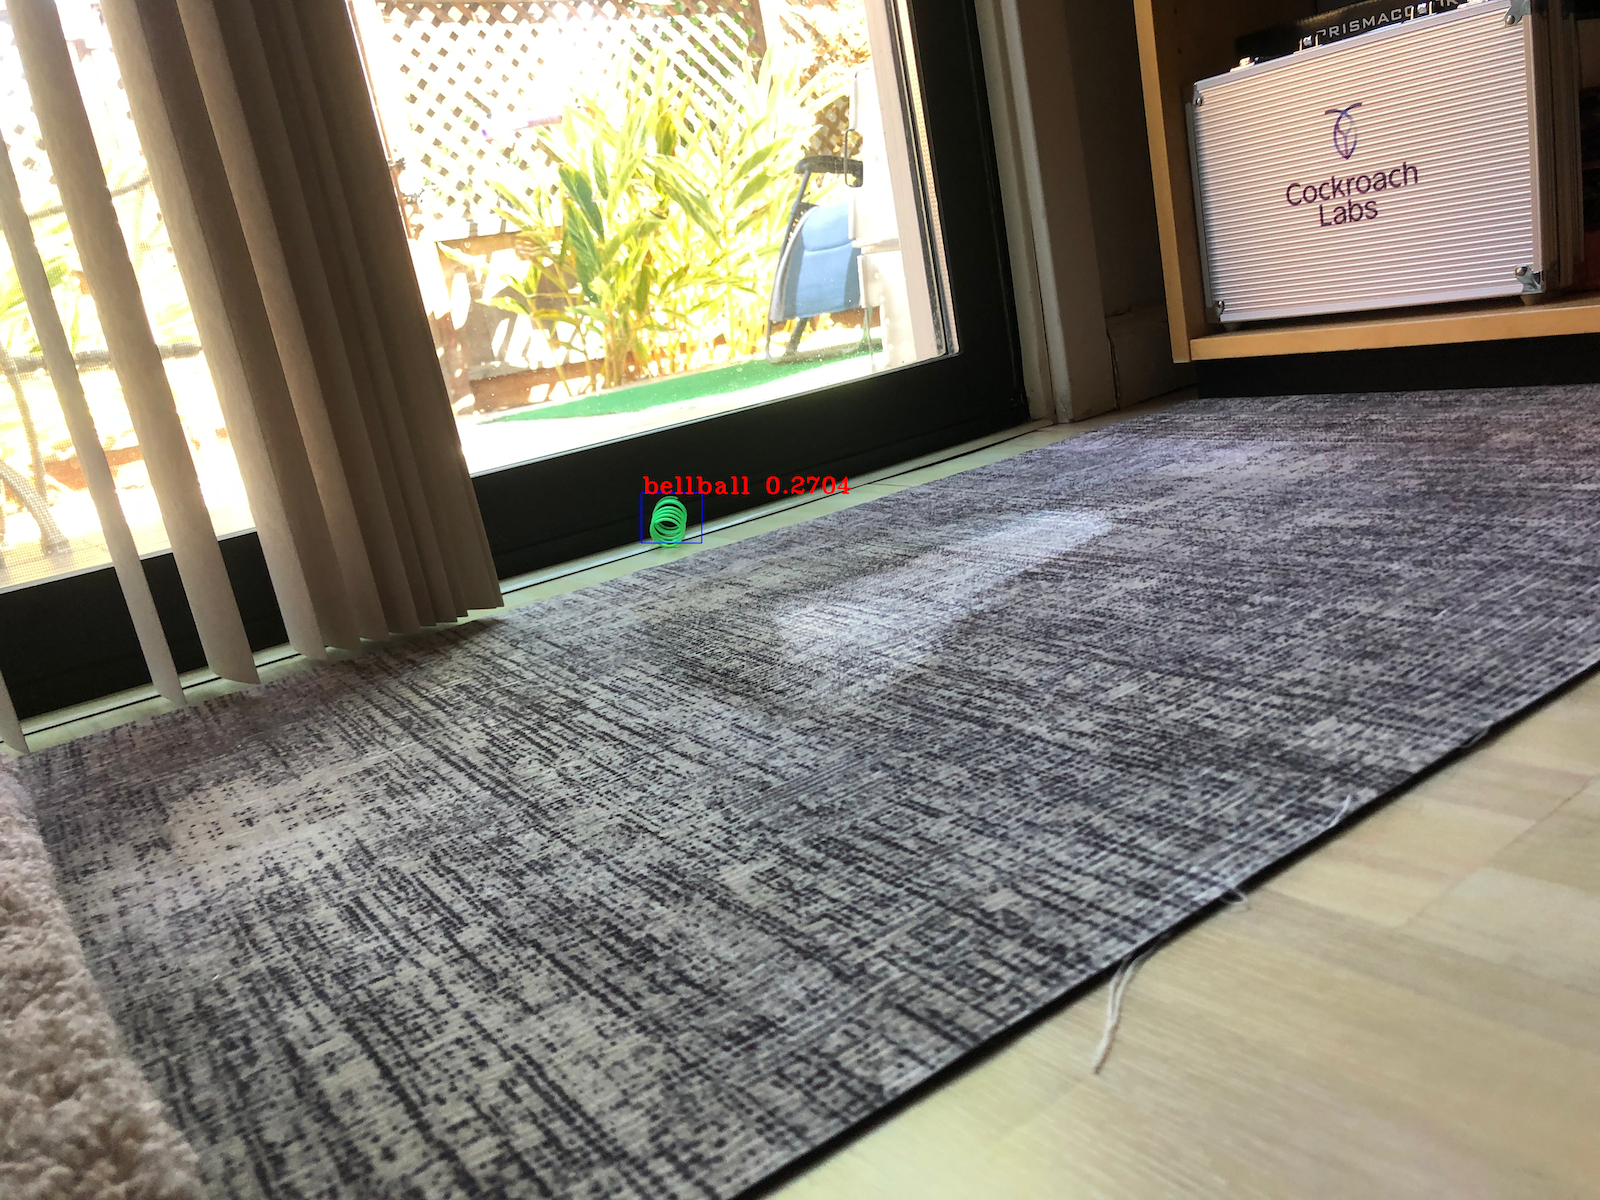 This is not a
 bellball. It’s a spring.
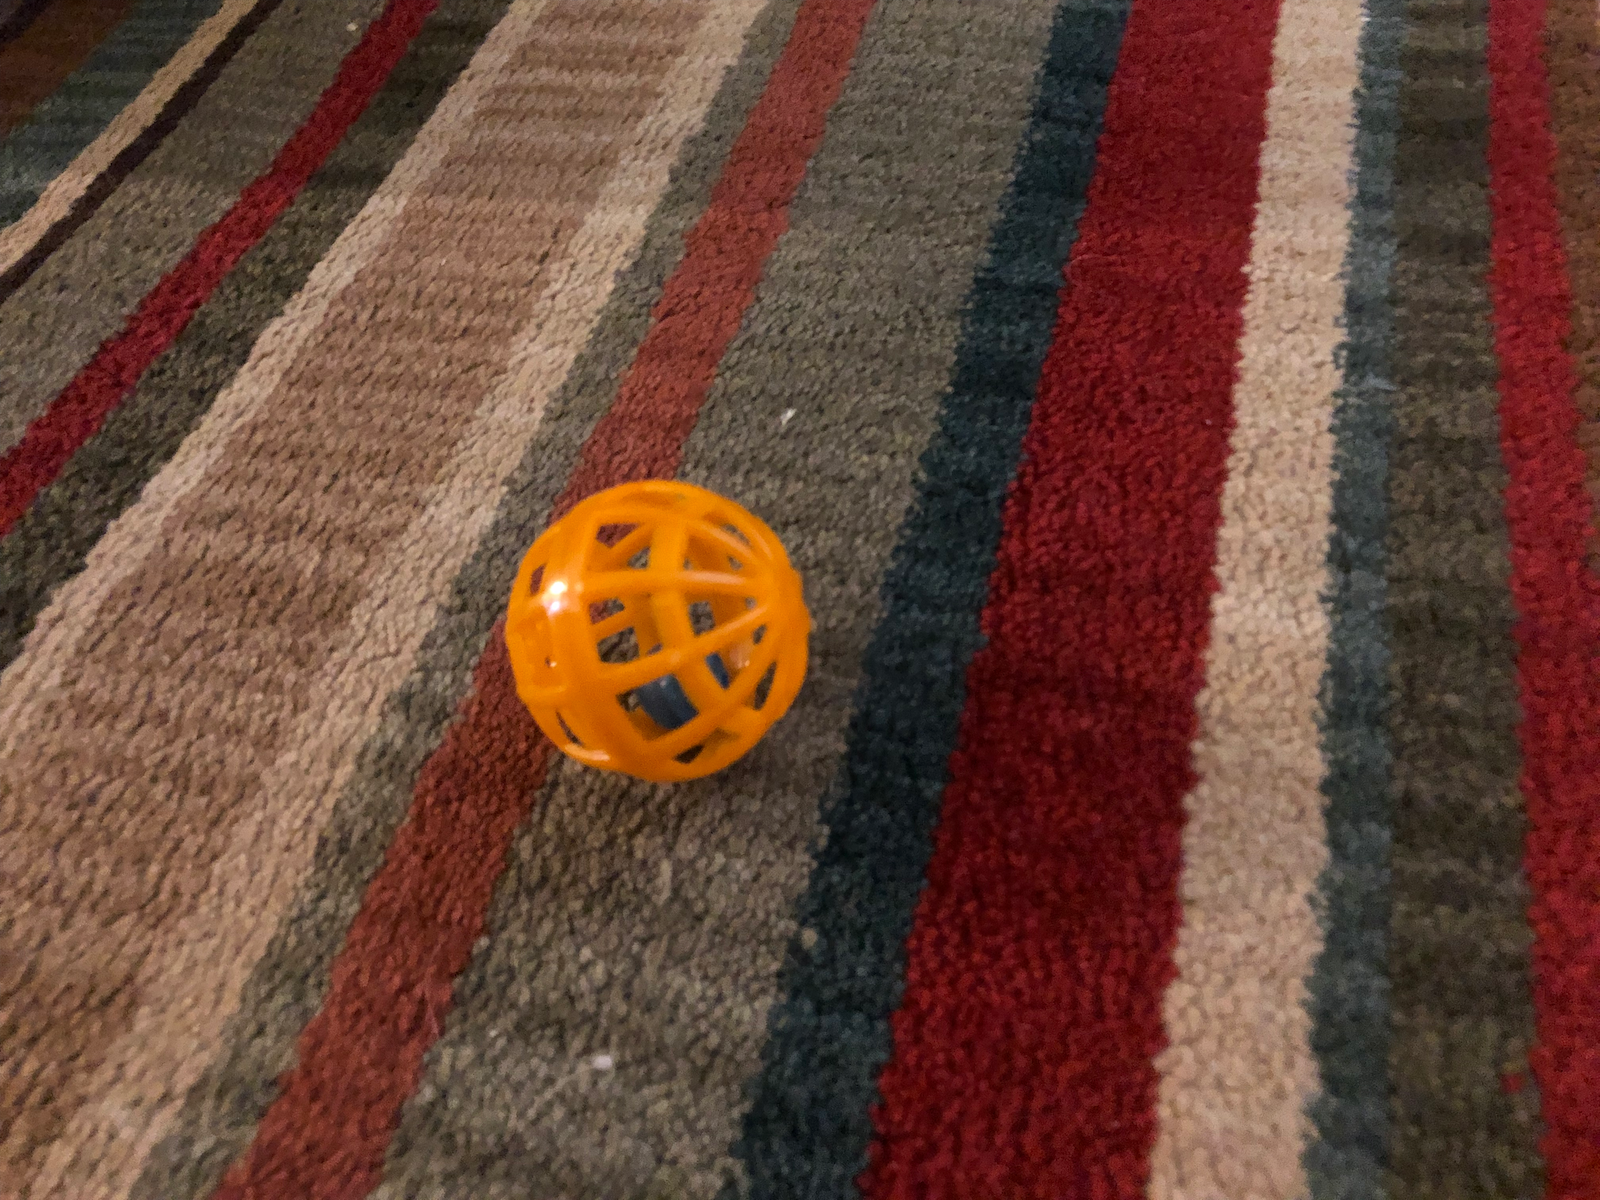 Complete miss.
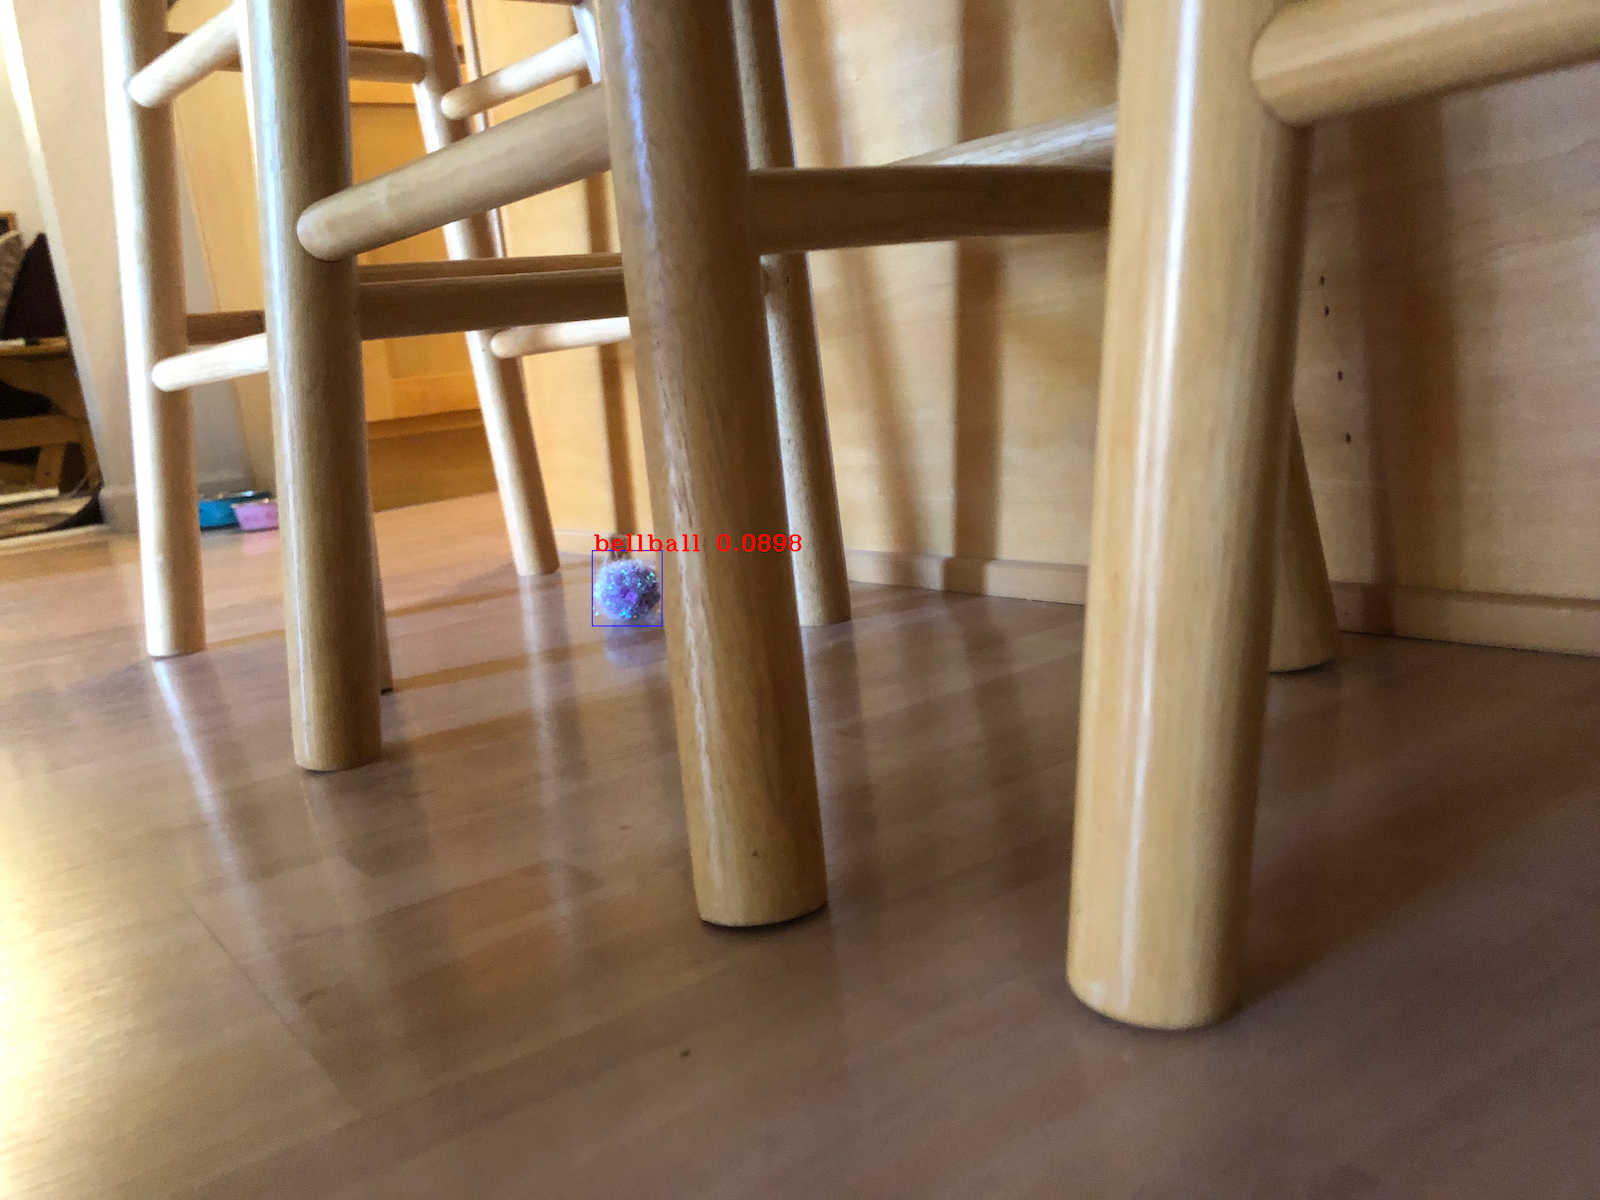 Not a
Not a bellball. It’s a tinselball. And low probability.
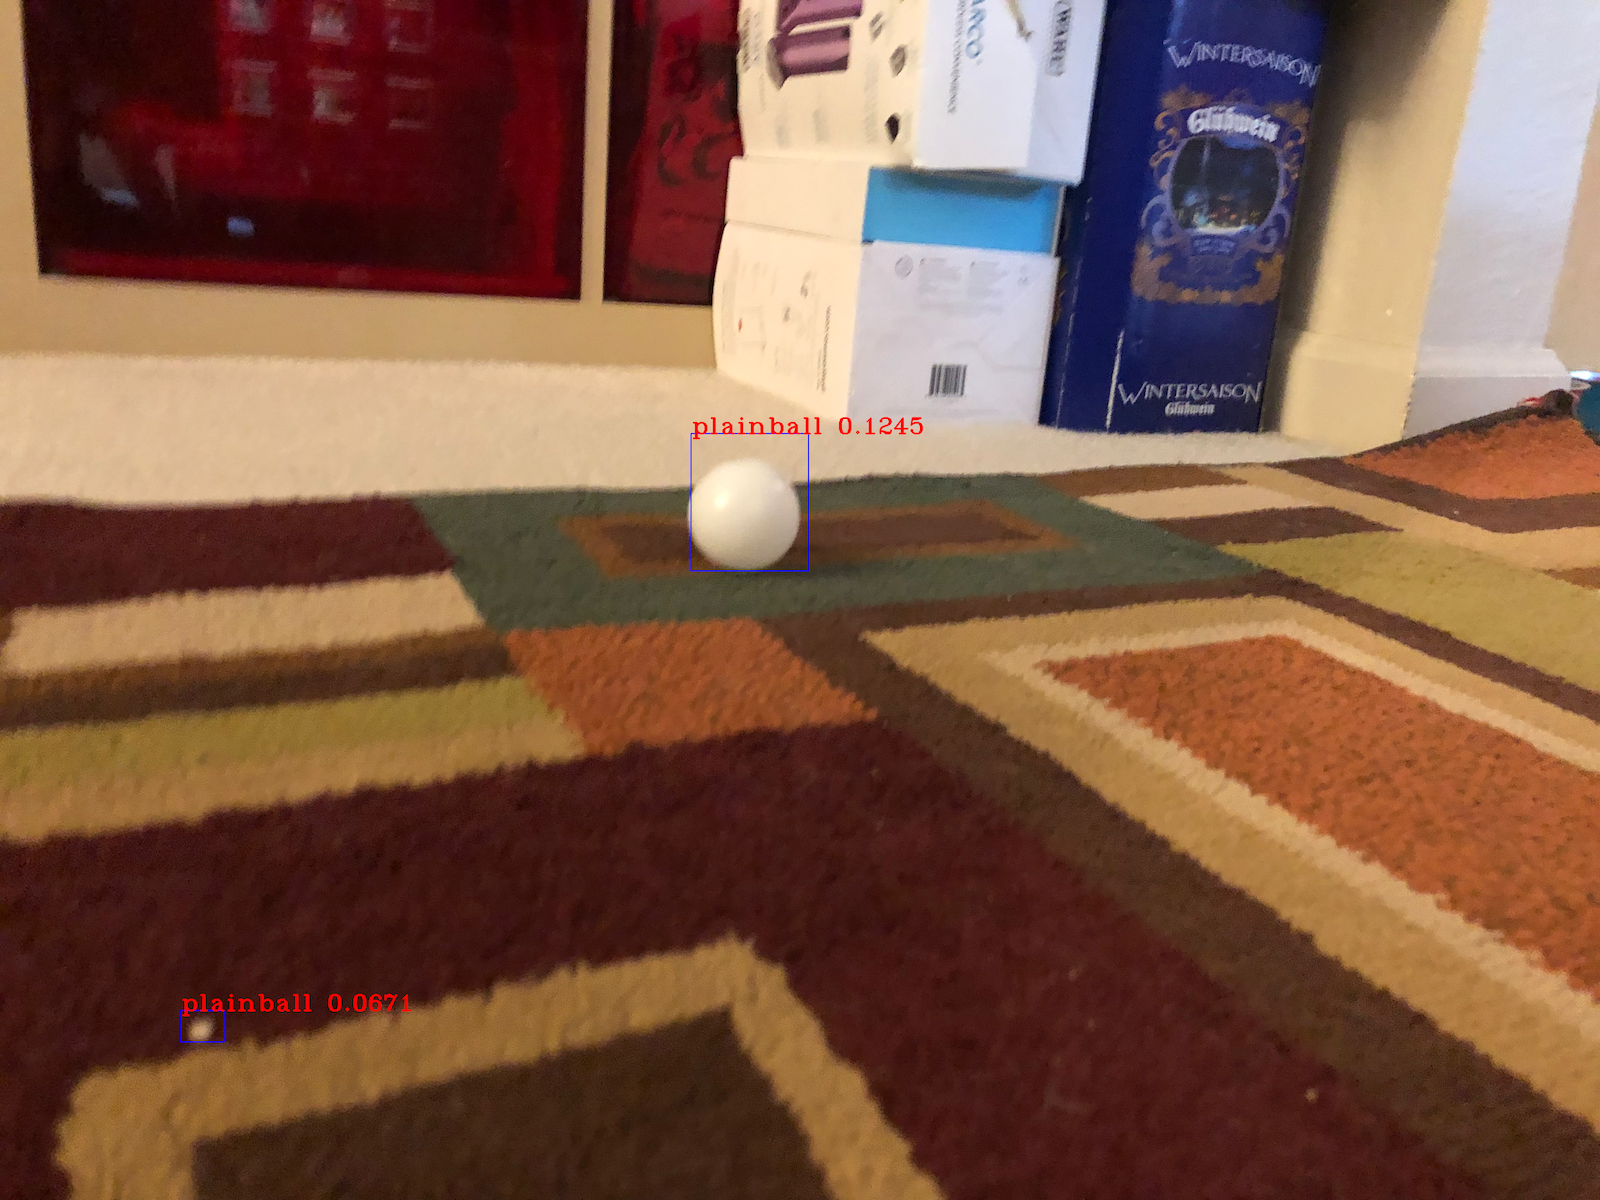 The
The plainball in the middle of the image is correct, but with low probability. The other object detected as a plainball is a small bunch of cat fluff on the carpet.
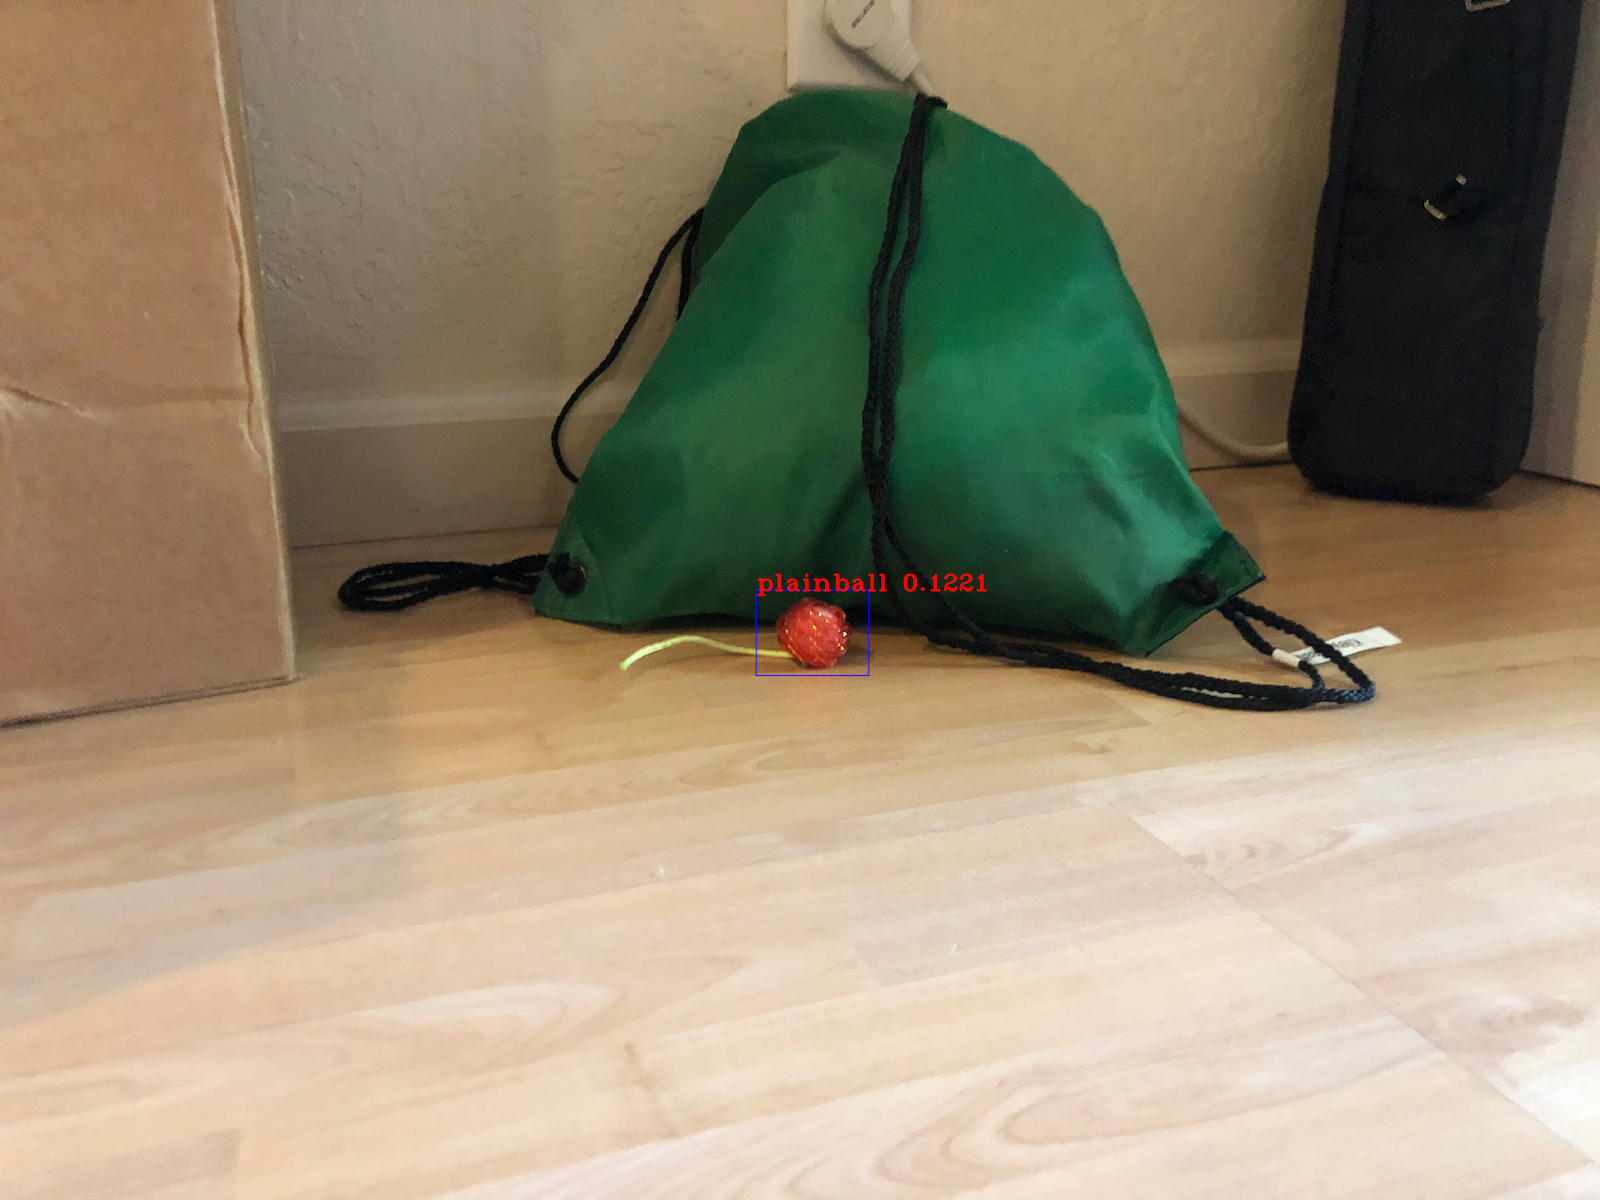 This is actually a
 springball.
But this is progress! The model works. I just need to improve its accuracy (or more correctly, both its precision and recall).
I could take more pictures, but instead I decided to try image augmentation. I first built my own image augmentation functions using code samples from https://blog.paperspace.com/data-augmentation-for-bounding-boxes/
The image augmentations turned out nicely, and generated a set of 10,386 augmented images. However it didn’t help the model produce better detections.
Up to this point, I was just training the model using mostly default hyperparameters (the ones suggested by the original author) and manually inspecting the results of batch detecting on a set of test images. But I had not yet really looked at training metrics like the loss curves.
So I turned to Weights and Biases (https://wandb.com) to help me with this.
On my first training run using wandb, I quickly saw that my model was overfitting, as evidenced by the divergence of the training and validation loss.
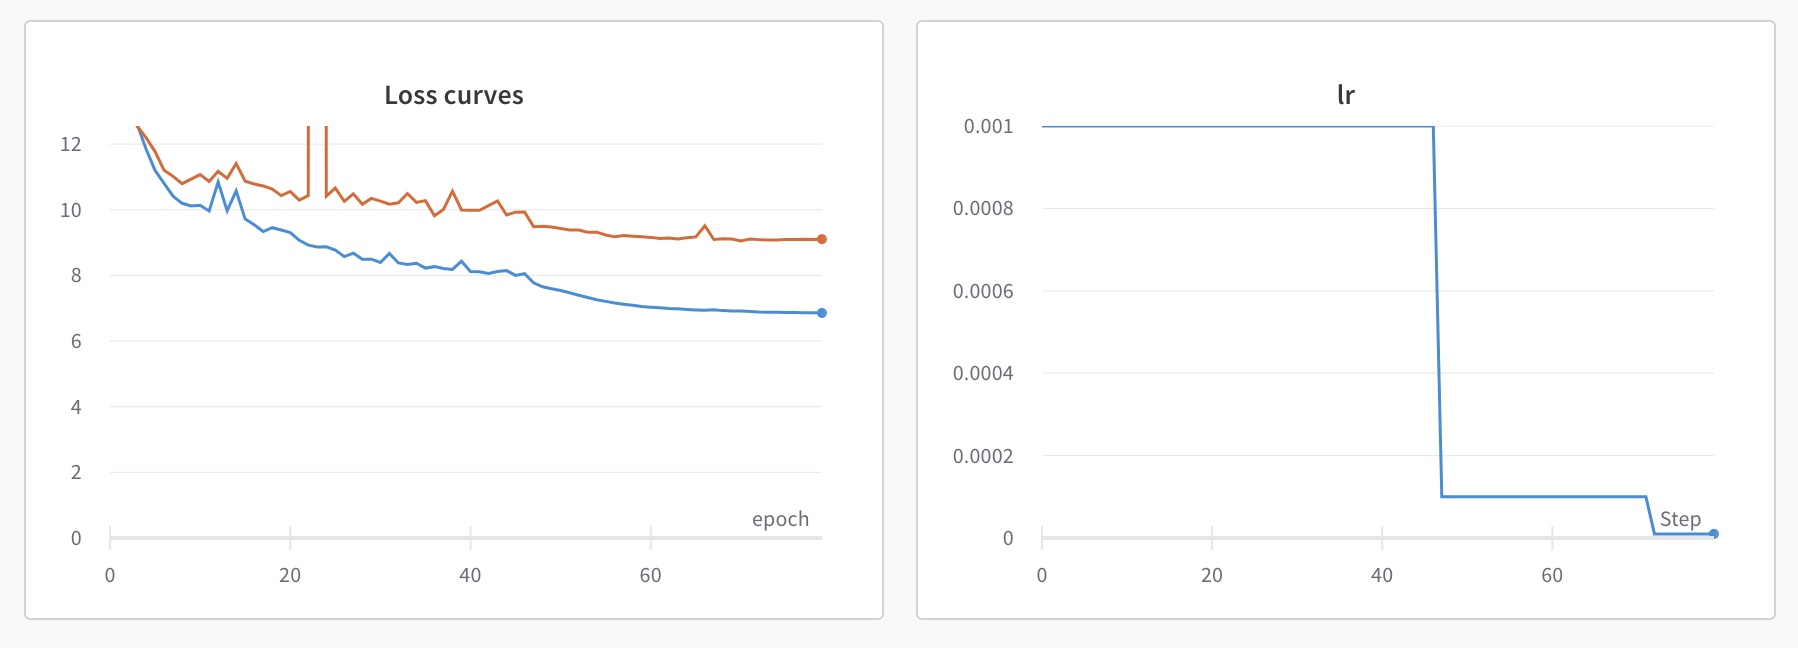
Overfitting can be solved many ways, but generally the most successful way is to have more input data. I already had over 10,000 input images, and I didn’t want to spend weeks annotating thousands of more images, so I looked for a more robust way to augment images. This is when I stubled on to Albumentations.ai which is a fantastic library for image augmentation. It has a very clear interface, and lots of possible augmentations which can be organized into a pipeline that applies the augmentations probablistically. It immediately obsoleted my custom augmentation module, but I’m glad I went through the work of making my module since it gave me a better understanding (and appreciation for) how image augmentation works. Specifically relating to keeping track of the bounding boxes when augmenting images.
With now up to 40,000 images through augmentation, I started training again.
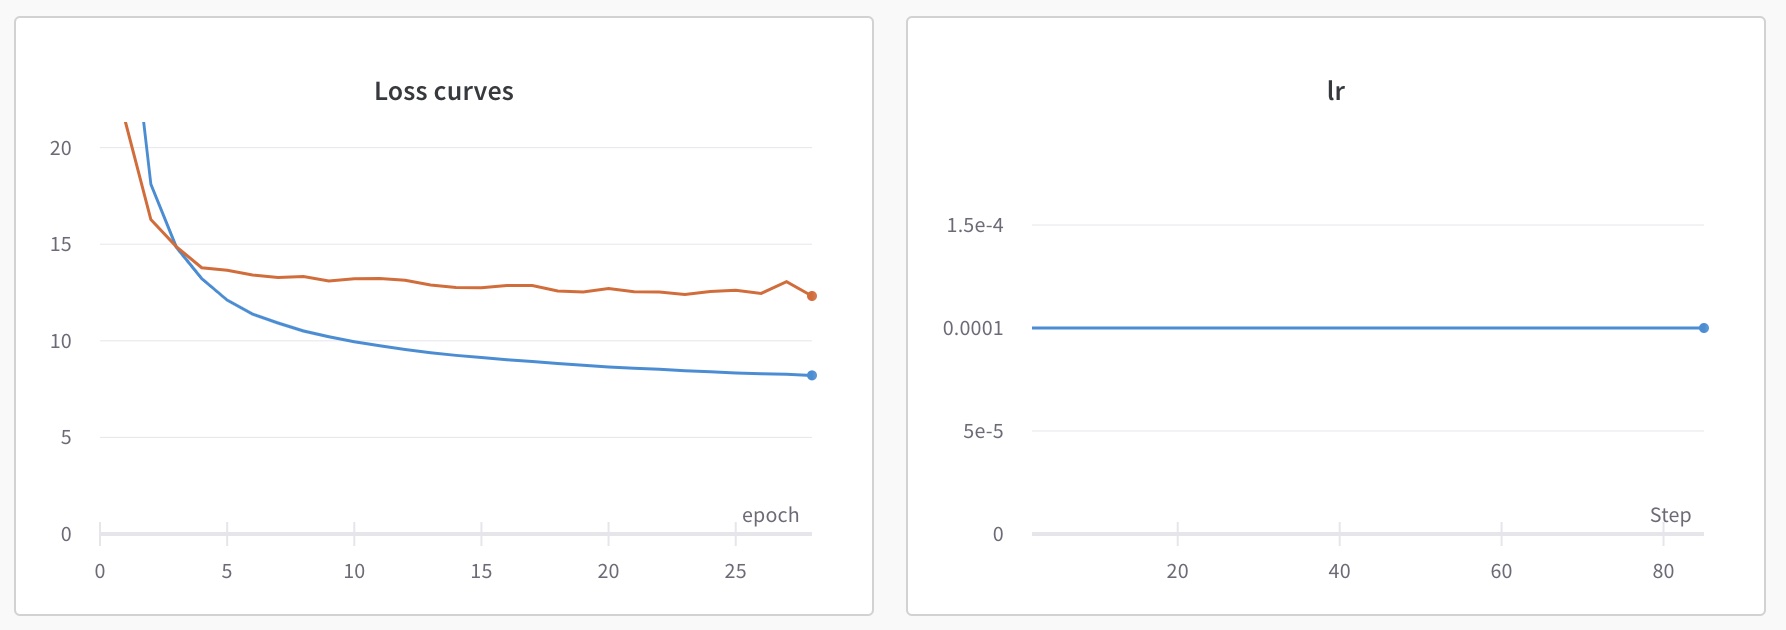
This is not better. Actually the losses are higher now, and we can see the training loss suffering from the effect of regularization from having a lot more images to train on. So more data isn’t currently looking like the solution I need.
I tried various other hyperparameter settings. I didn’t have access to a powerful computer with a GPU, and each training run took hours, so I wasn’t doing an automated hyperparameter search method. I was simply evaluating a run, and choosing manually which hyperparameter I wanted to adjust.
I had some luck with tuning batch_size. Lower values yielded lower training loss, but also higher overfitting. I realized that with my 40k+ augmented image set, I had a lot of highly distorted object images. So I reconfigured my albumentations script to only produce non-distorted image augmentations. This brought the image set down to about 20,000 images, simply because I was running out of ways I could augment any one of my original 576 images.
But ultimately, I wasn’t able to get the loss curves to improve much.
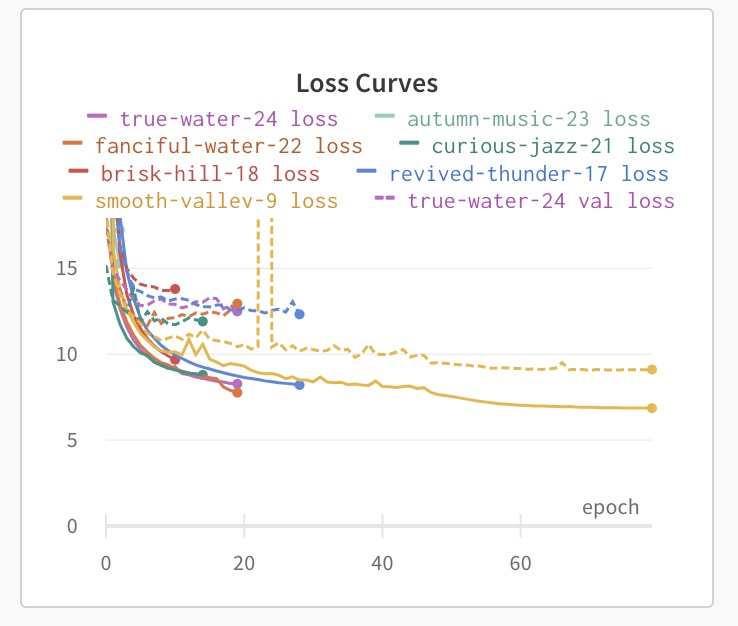
Then it dawned on me. The author of of the YOLOv3 model I was using created both a regular YOLOv3 model with the typicaly 3 YOLO layers, but also a YOLOv3-tiny model with only two layers. Everything I had read about YOLOv3 used the regular model, but also everything I read was using large, many-class image sets like the COCO dataset. If overfitting is my problem, I’m probably using a model that is too complex for my use case.
So I re-configured my scripts to use the YOLOv3-tiny model.
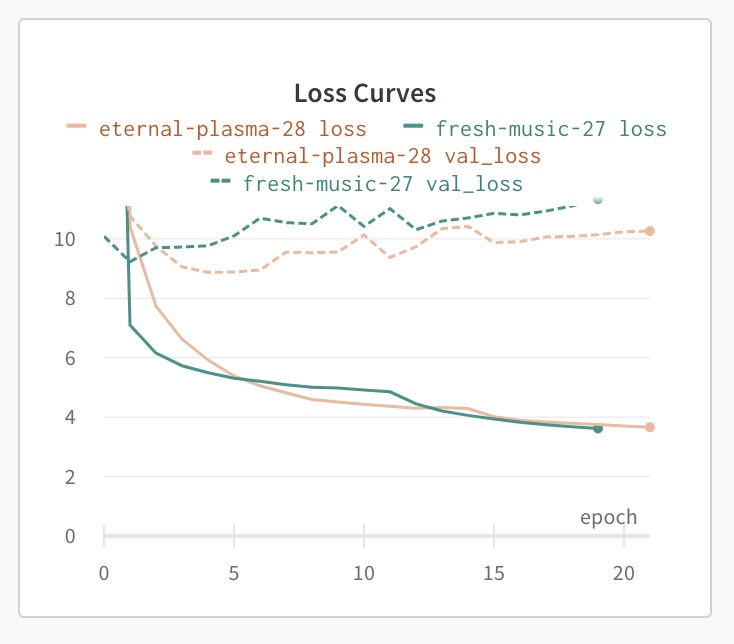
This indeed dropped the losses, but the model is still overfitting quite a bit. I tried increasing batch_size to help regularize the training, and tried the larger 40K augmented image set again to help generalize the model, but it still was overfitting. And when I ran the test images through the model for detection, the accuracy was about the same as when I first started training with this model.
At this point, I started thinking I needed a different type of object detection model.
Trying Ultralytics’s YOLOv5 model
When I was reading about YOLO, I saw serveral places where there was criticism around organizations and individuals who seemingly latched on to the YOLO name to promote their own models. One of the ones often mentioned was Ultralytics’s YOLOv5 model.
Curious, I took a look at their Github repo and website, and I found it remarkably well documented. Then I spun up a Docker container and cloned their repo, and went through their examples. I was very pleasantly suprised with how well it all worked. As I started digging into their code, I saw that I could easily integrate their code into the use case I had in mind - specifically a ROS2 node to perform object detection and bounding box identification of my cat toys.
The real litmus test is how it would do with my image data. So I fired up a training run with YOLOv5 and my non-distorted 20K augmented image set.
First off, the metrics output by the YOLOv5 model are far nicer, including precision & recall metrics and mAP 0.5 / mAP 0.5:0.95. But also the loss curves look a lot better.

The first run, with the YOLOv5s model, and all default hyperparemeters, converged in 50 epochs!
The loss values are a lot smaller, however I’m sure the loss functions are very different between these two models, so those values can’t be compared. However the convergence pattern of the loss curves looks far better than with the YOLOv3 model I had been using.
The real proof is how it performs during detection.
 Only the closest
 fabricsprintg was detected, but it was at 90% probability. I can work with that, since the robot can move closer to the other spring as it continues its search for cat toys.
 The
The fabricspring was correctly detected, and at 90% probability.
 This is indeed a
 spring, and not a bellball as the YOLOv3 model thought.
 The YOLOv3 model missed this completely.
 Correct as a
 tinselball and at 93% probability
 The
The plainball was detected at a much higher 96% probability, and the fluff clumb was properly ignored.
 And finally, the
 stringball was correctly identified, again at high probability.
And this was all after a single training run of 50 epochs. I’m sure I can improve the model by improving the training images and hyperparameter tuning. But these results are good enough that I can use the model as-is for my next phases of the robot development.
So now it’s time to start working on converting the previous B2 nodes that are ROS1 nodes, into R2B2 ROS2 nodes.
Next: Converting to ROS2